Broke in Tiny Pieces
Sculptural Mosaic Art Studio
Making a Mermaid Mural
With thanks to Rosy and Rich Bergin who gave me free rein to create a mural on the wall of their restaurant, and with love and gratitude to my friend Mary Susan Cate, who offered to paint the mermaid's face and body in collaboration with me on this project.
June 2017-- I sat across from the proprietor of Rosy's at the Beach in Morgan Hill, having dropped by to ask if there might be some small area in her restaurant I could embellish with a mosaic. My mother had long been keeping her fingers crossed she might see some of my work displayed downtown, and I was now ready to make her hope a reality.
"How about mosaicing our back wall?" Rosy asked.
I laughed, considering the size of such a project,"But that would take me forever!"
Well...not exactly forever, but fifteen months to be exact. In mid-October 2018, with the"barn-raising" help of good friends, the Mermaid Mural was installed; a labor of love dedicated to my mother and all the little girls who believe in mermaids like I do..
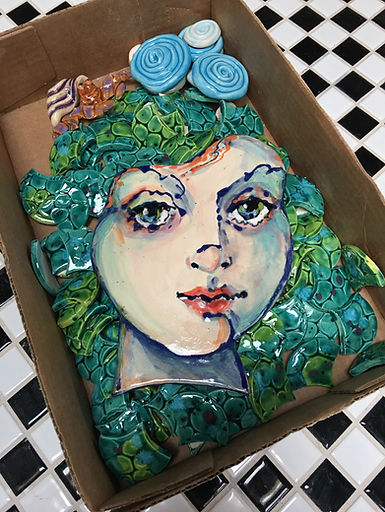
Mary's mermaid face sits in a box atop the scales I created for the tail.
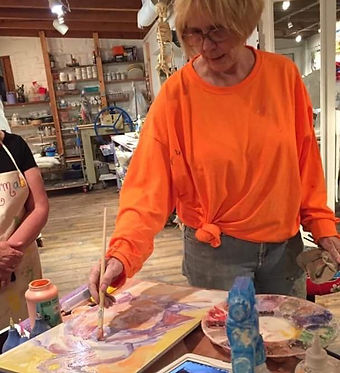
Above: Tucson artist Mary Susan Cate demonstrates her method of painting on tile using the special glazes she has formulated for this process. Students from around the world and throughout the U.S. fill the many workshops Mary offers in her beautifully appointed desert studio. Mary's classes are amazing, I know; I've been a student twice. Check out her website: www.merryarttoones.com

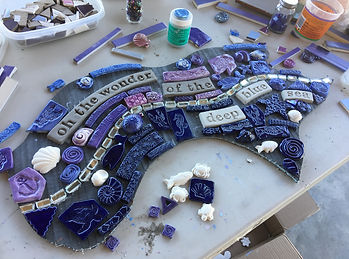
The body tiles made and fired in my studio were packed and shipped to Tucson. This photo was my first peek as they were laid out on Mary's table in the process of being glazed.
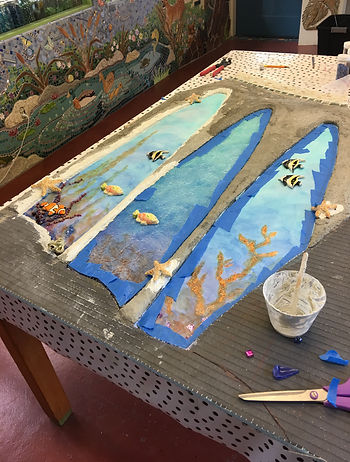
Above: Wedi board for the base of the spire was first outlined and built up with Shapecrete, then plastered smooth in the window areas, gessoed, and painted with watercolor. Ceramic fish and glass beads were added, followed by islands of shattered tempered glass mosaiced together and set in epoxy resin. Ceramic pieces were adhered to the form with white thinset and then grouted together. Dichroic glass was added to some of the ceramic pieces using a glass kiln.
All the ceramic pieces in the mural, except for the turquoise field tile lacking impressions, have been made by hand. I start with Venus White, Cone 5 clay, and sculpt freehand. Some pieces, like the seashells and a few of the starfish, are made by using molds. The clay is then dried for a period of days and bisque fired in the kiln to 1945F. The bisque pieces are then glazed and fired to vitrification at 2167 F. Pieces are often reglazed and fired a second or third time to get the desired effect.
Ceramics is not an art form for the easily discouraged. One never knows what they will get when opening the kiln: shouts of joy or buckets of tears. Sometimes the glaze turns out in unexpected or disappointing ways, or a large piece that has been worked on for weeks may crack during firing.

My Process


Above Left: Laying out the scales to make the mermaid's tail. Scales that overlapped the form were cut to fit and the edges then reglazed and re-fired in the kiln. Right: Fresh clay pieces (part of mermaid's throne) weighted down with glass beads to keep the clay from warping as it dries.
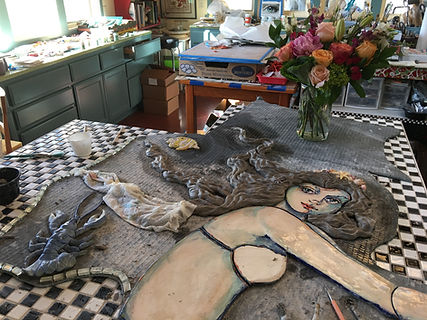

Bad day at the office.
Sculpting mermaid hair next to my birthday roses.
PG&E Loves Me

1. Clay shells which have already been fired once in a 240V kiln at 1945F to bisque are painted with under-glaze.

2. Bisqued under-glazed tiles are then loaded into the kiln and fired a second time to set the glaze.
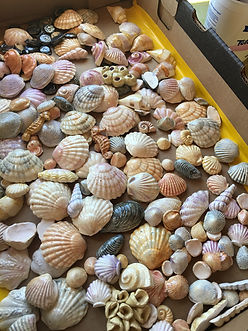
3. Tiles are then removed from the kiln, glazed one last time with a clear shiny glaze and reloaded to be fired for a third time to vitrification at 2167F.
Not The Easiest Way to Mosaic
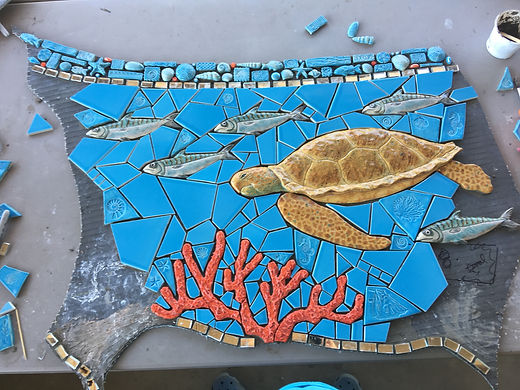
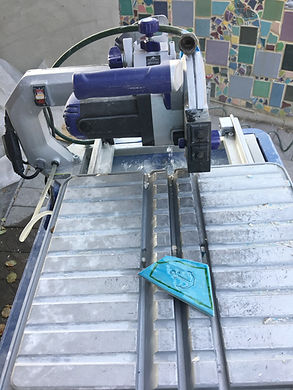
I usually piece tiles by hand, cutting them with heavy-duty tile clippers. Unfortunately, the beautiful turquoise field tile I purchased for this project were so hard that more powerful assistance was required for the job. This made for a long, painstaking process. Every mosaic piece had to be cut on the tile saw and its edges honed with a file as the glaze tended to chip and crack. 5 diamond tile blades and 3 diamond files went into the recycle bin during the process of cutting the field tile. Gratefully all ten fingers survived intact.

Installation site on back patio of restaurant.
The mural was built on Wedi board, a German-made, light weight foam core board with a cementitious surface on either side. The design was put on paper and transferred to the Wedi board using graphic paper. The board was then cut into puzzle pieces with cuts made in curves around the major elements. A total of 20 puzzle pieces were used. Tiles and ceramic pieces were attached with thinset, and the majority of the mural was grouted in the studio before installation.
On installation day, a metal ledge was leveled and screwed into the wall for the bottom Wedi pieces to sit on. Pieces were attached to the wall one by one, in a specific order, back-buttering each board with thinset and screwing it in place on the wall. Getting the seams to align perfectly was by far the biggest challenge of this endeavor. The seams, which had been left free of tiles, were mosaiced on day two of installation. All mural seams were then grouted in and water proofed with grout sealer.

Building the elements on wedi puzzle pieces

Grouting in the seams.

My mother and I in front of finished mural. 14' X 7'

Sealing grout on pieces prior to install.
Video close up of mural: Hubby doing last minute polishing.

